> ## Documentation Index
> Fetch the complete documentation index at: https://integrations.docs.commenda.io/llms.txt
> Use this file to discover all available pages before exploring further.
# Microsoft Dynamics 365 Business Central
> Learn how to set up our Microsoft Dynamics 365 Business Central integration.
If you wish to set up Microsoft Dynamics 365 Business Central on the RootFi Portal, you will need to follow the steps outlined below.
You will need to have verified your company domain in order for you to link your Microsoft Dynamics 365 Business Central integration
Follow the link [https://portal.azure.com/#view/Microsoft\_AAD\_RegisteredApps/ApplicationsListBlade](https://portal.azure.com/#view/Microsoft%5FAAD%5FRegisteredApps/ApplicationsListBlade)
Click on the +New Registration, you will see a form like this.
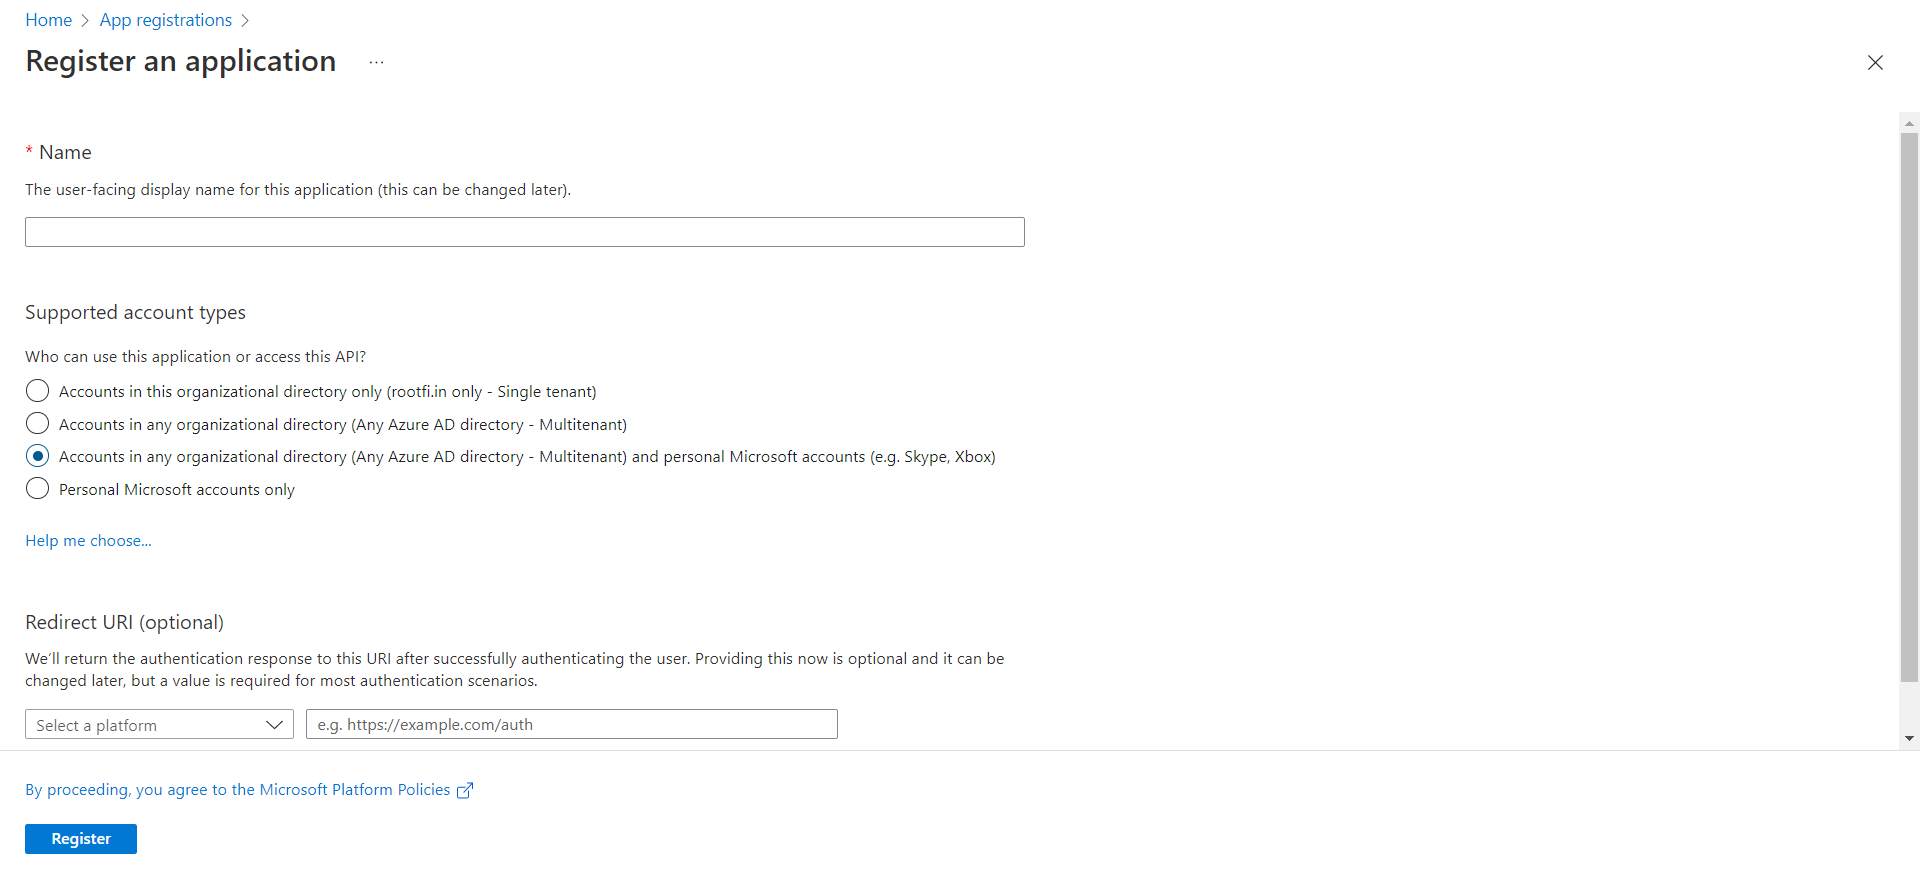 1. Enter the user-facing display name for this application (this can be changed later).
2. Select Supported account types: Select Accounts in any organisational directory (Any Azure AD directory - Multi-tenant) and personal Microsoft accounts (e.g. Skype, Xbox). This allows RootFi to access data in Dynamics 365 Business Central.
3. In the Redirect URI, select the dropdown value as Web and in the value, paste the url, [ROOTFI CALLBACK URL](/api-reference/v3/overview/environments#callback-urls)
4. Now Click the Register Button, now you have created an app.
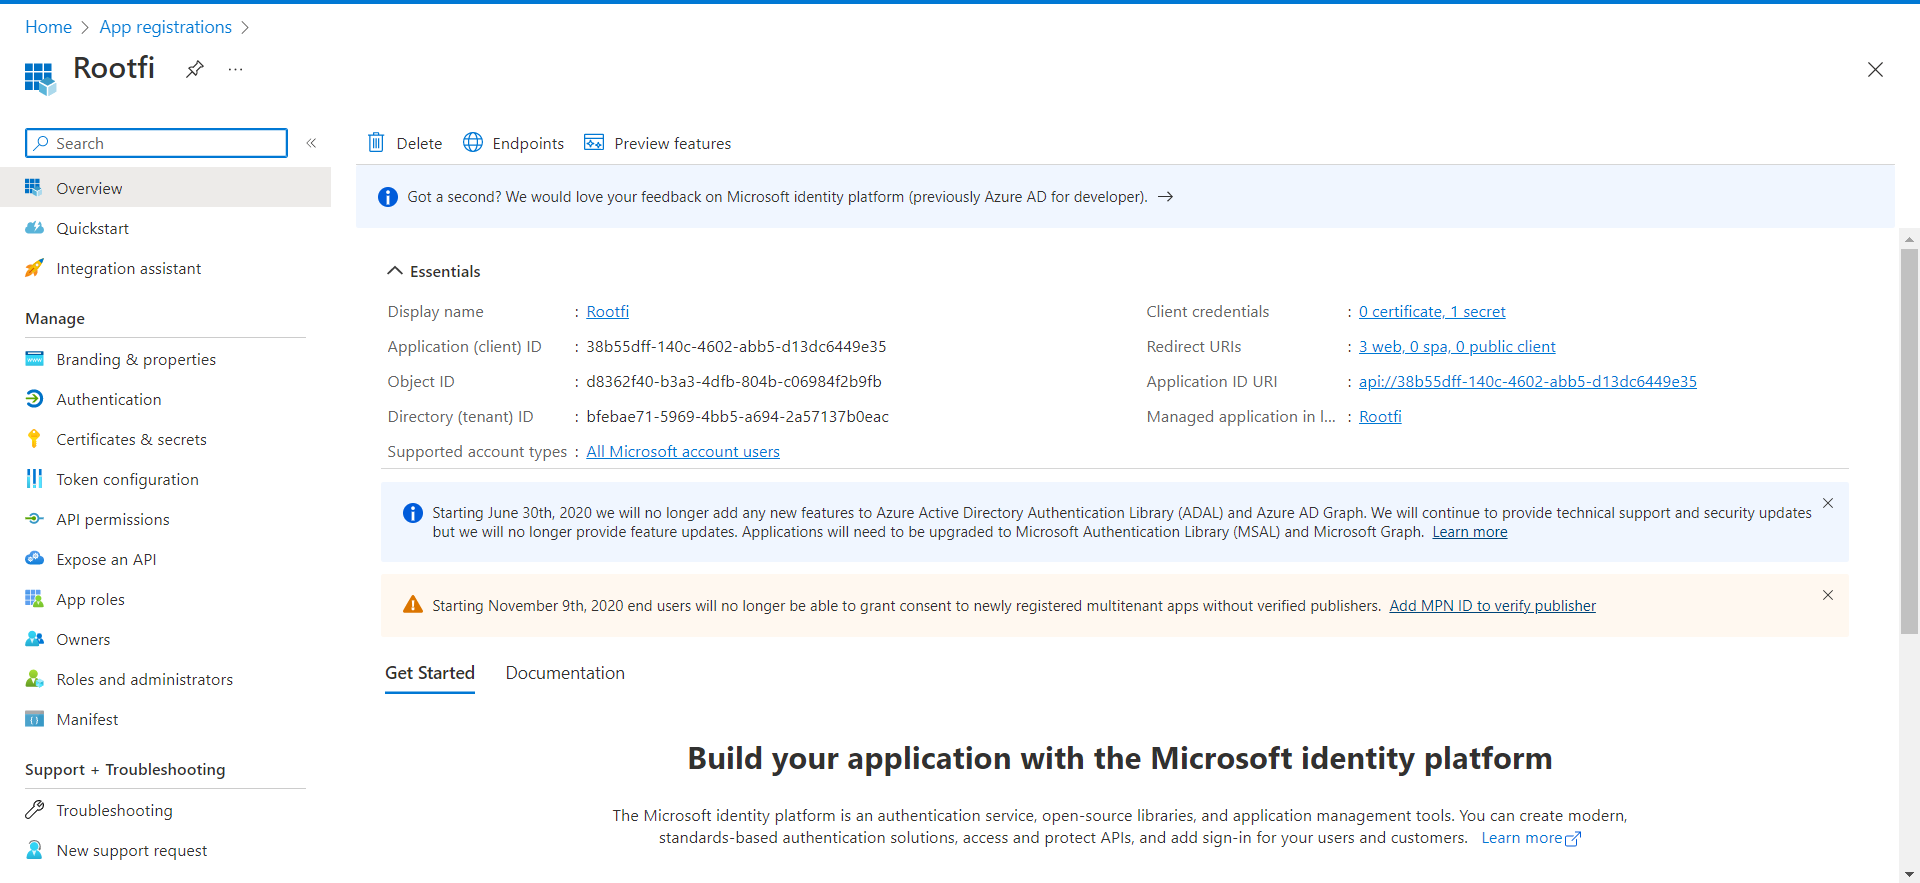
5. Below, You can see the newly created app.
***
1. Click on the newly created app, Go to the Overview section, you can see the Application Client ID.
1. Enter the user-facing display name for this application (this can be changed later).
2. Select Supported account types: Select Accounts in any organisational directory (Any Azure AD directory - Multi-tenant) and personal Microsoft accounts (e.g. Skype, Xbox). This allows RootFi to access data in Dynamics 365 Business Central.
3. In the Redirect URI, select the dropdown value as Web and in the value, paste the url, [ROOTFI CALLBACK URL](/api-reference/v3/overview/environments#callback-urls)
4. Now Click the Register Button, now you have created an app.
5. Below, You can see the newly created app.
***
1. Click on the newly created app, Go to the Overview section, you can see the Application Client ID.
 ***
In the Azure Portal:
1. Select Certificates & secrets in the left menu.
2. Under Client secrets, click New client secret.
3. In the Add a client secret dialogue, update the following information:
4. Description: Enter a short description of your client secret to make it easier to find.\
Expires: Select the most appropriate option that complies with your company's security policy.\
Click Add.
Your **client secret** is generated and displayed at the bottom of the page.
**Important**
The secret value won't be displayed again in full, so you must copy the value as soon as it gets generated.
***
Now update the access permissions for your application. These control the data that your app can access in Business Central.
1. Select API permissions in the left menu.
2. Under Configured permissions, click Add permission.
3. In the Request API permissions pane, scroll down and select Dynamics 365 Business Central.
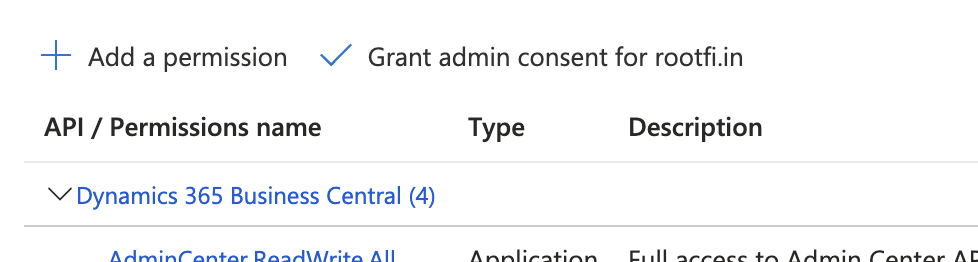
4. Select Application permissions and also select the listed permissions:\
**AdminCenter.ReadWrite.All**, **API.ReadWrite.All**, **app\_access** and **Automation.ReadWrite.All**.
***
In the Azure Portal:
1. Select Certificates & secrets in the left menu.
2. Under Client secrets, click New client secret.
3. In the Add a client secret dialogue, update the following information:
4. Description: Enter a short description of your client secret to make it easier to find.\
Expires: Select the most appropriate option that complies with your company's security policy.\
Click Add.
Your **client secret** is generated and displayed at the bottom of the page.
**Important**
The secret value won't be displayed again in full, so you must copy the value as soon as it gets generated.
***
Now update the access permissions for your application. These control the data that your app can access in Business Central.
1. Select API permissions in the left menu.
2. Under Configured permissions, click Add permission.
3. In the Request API permissions pane, scroll down and select Dynamics 365 Business Central.
4. Select Application permissions and also select the listed permissions:\
**AdminCenter.ReadWrite.All**, **API.ReadWrite.All**, **app\_access** and **Automation.ReadWrite.All**.
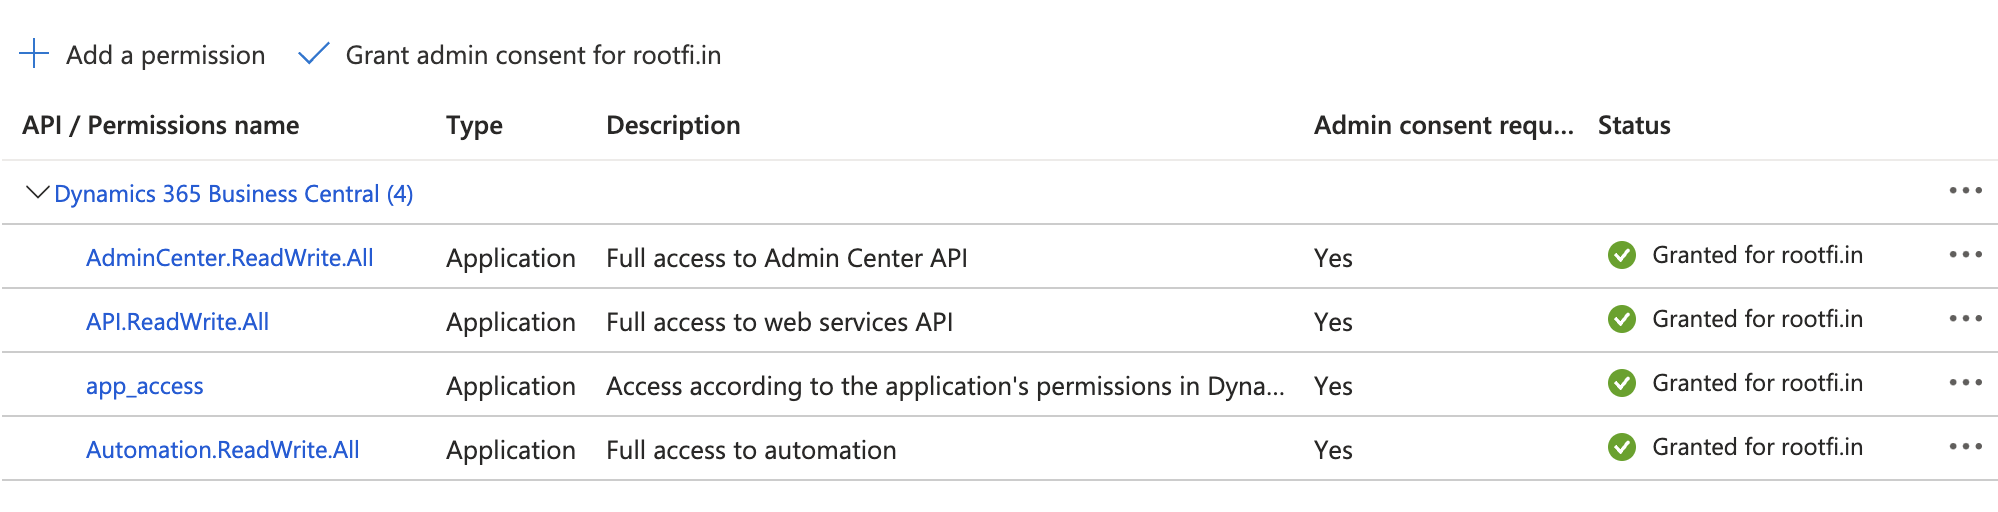 5. Click 'Add Permissions'.
6. Above the listed permissions, select Grant admin consent for Default Directory and then select Yes to confirm your change. This option might not be available for all subscription types
5. Click 'Add Permissions'.
6. Above the listed permissions, select Grant admin consent for Default Directory and then select Yes to confirm your change. This option might not be available for all subscription types
 ***
To complete your setup, enable the Azure Entra App **from within Business Central**:
Navigate to the following link and sign into
[https://businesscentral.dynamics.com](https://businesscentral.dynamics.com)
1. Click the **search icon** (🔍) in the top-right corner, search for **“Entra”**, and click **Microsoft Entra Applications**:
***
To complete your setup, enable the Azure Entra App **from within Business Central**:
Navigate to the following link and sign into
[https://businesscentral.dynamics.com](https://businesscentral.dynamics.com)
1. Click the **search icon** (🔍) in the top-right corner, search for **“Entra”**, and click **Microsoft Entra Applications**:
 2. Click **New**.
 3. In the form that appears, paste your **Client ID** into the **Client ID / App ID** field.
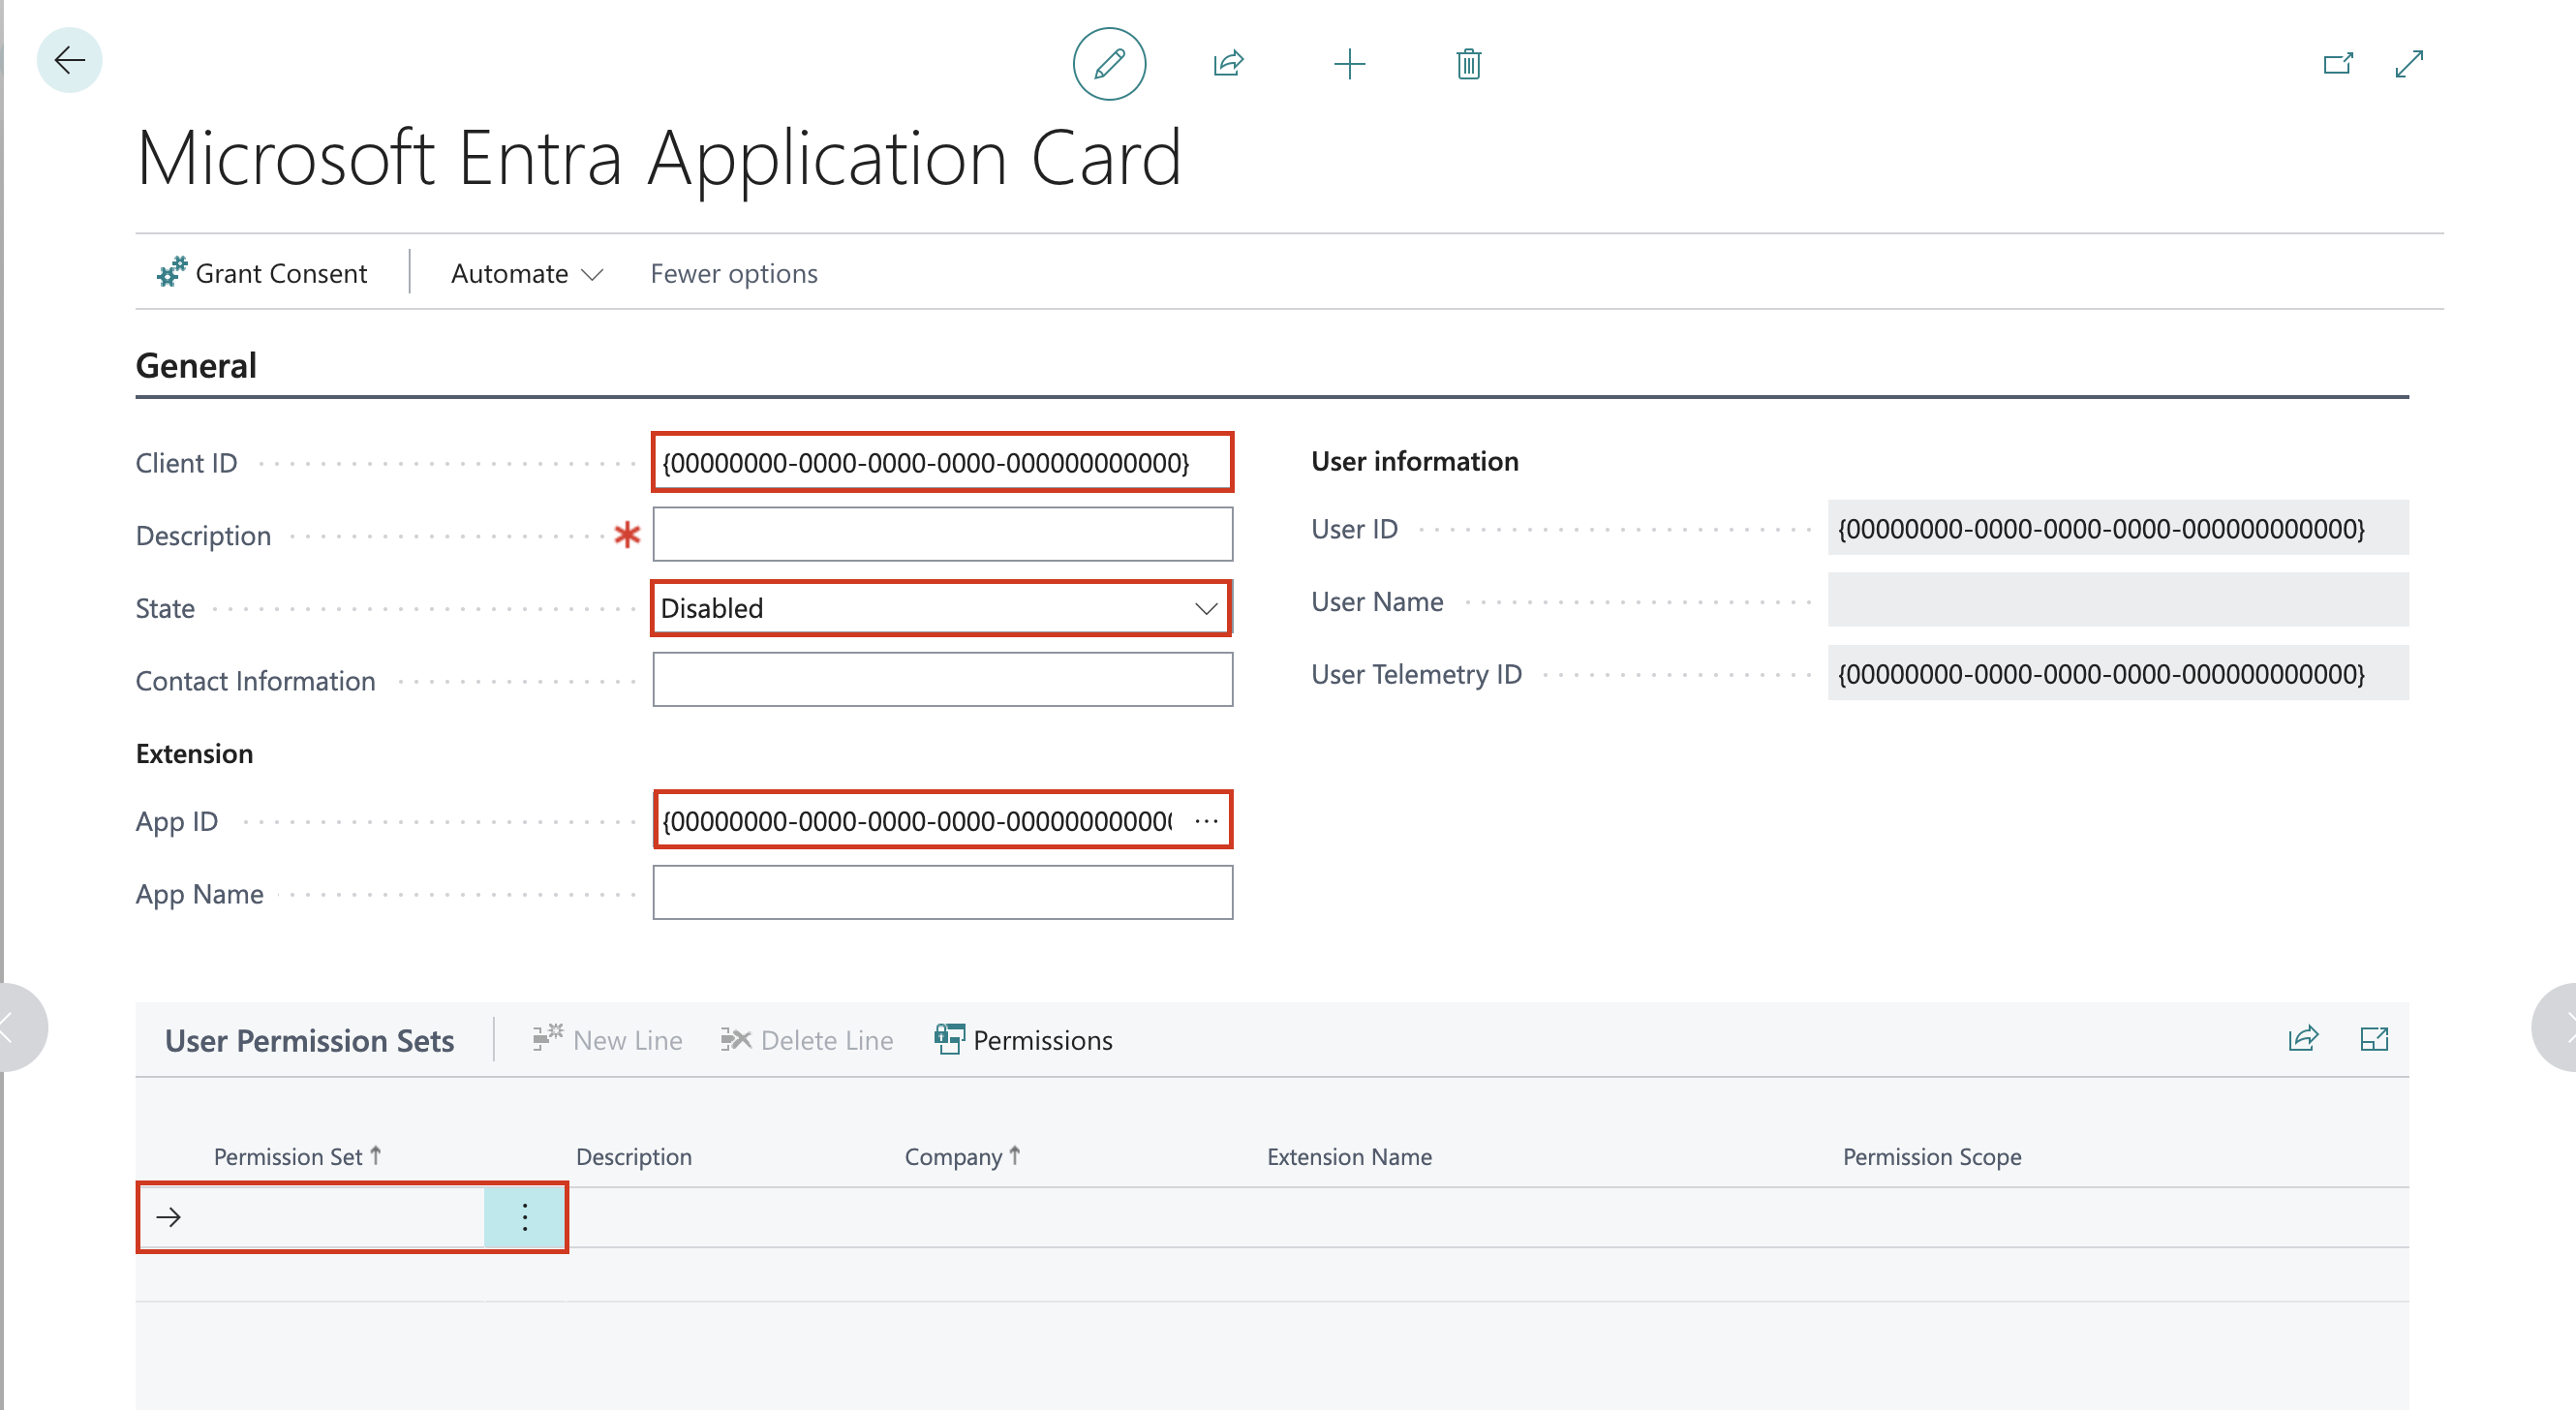 4. From the **State** dropdown, select **Enabled**.
5. Scroll down to the permissions section and assign **Administrator** access.
4. From the **State** dropdown, select **Enabled**.
5. Scroll down to the permissions section and assign **Administrator** access.
 6. Click **Save** to apply the changes.
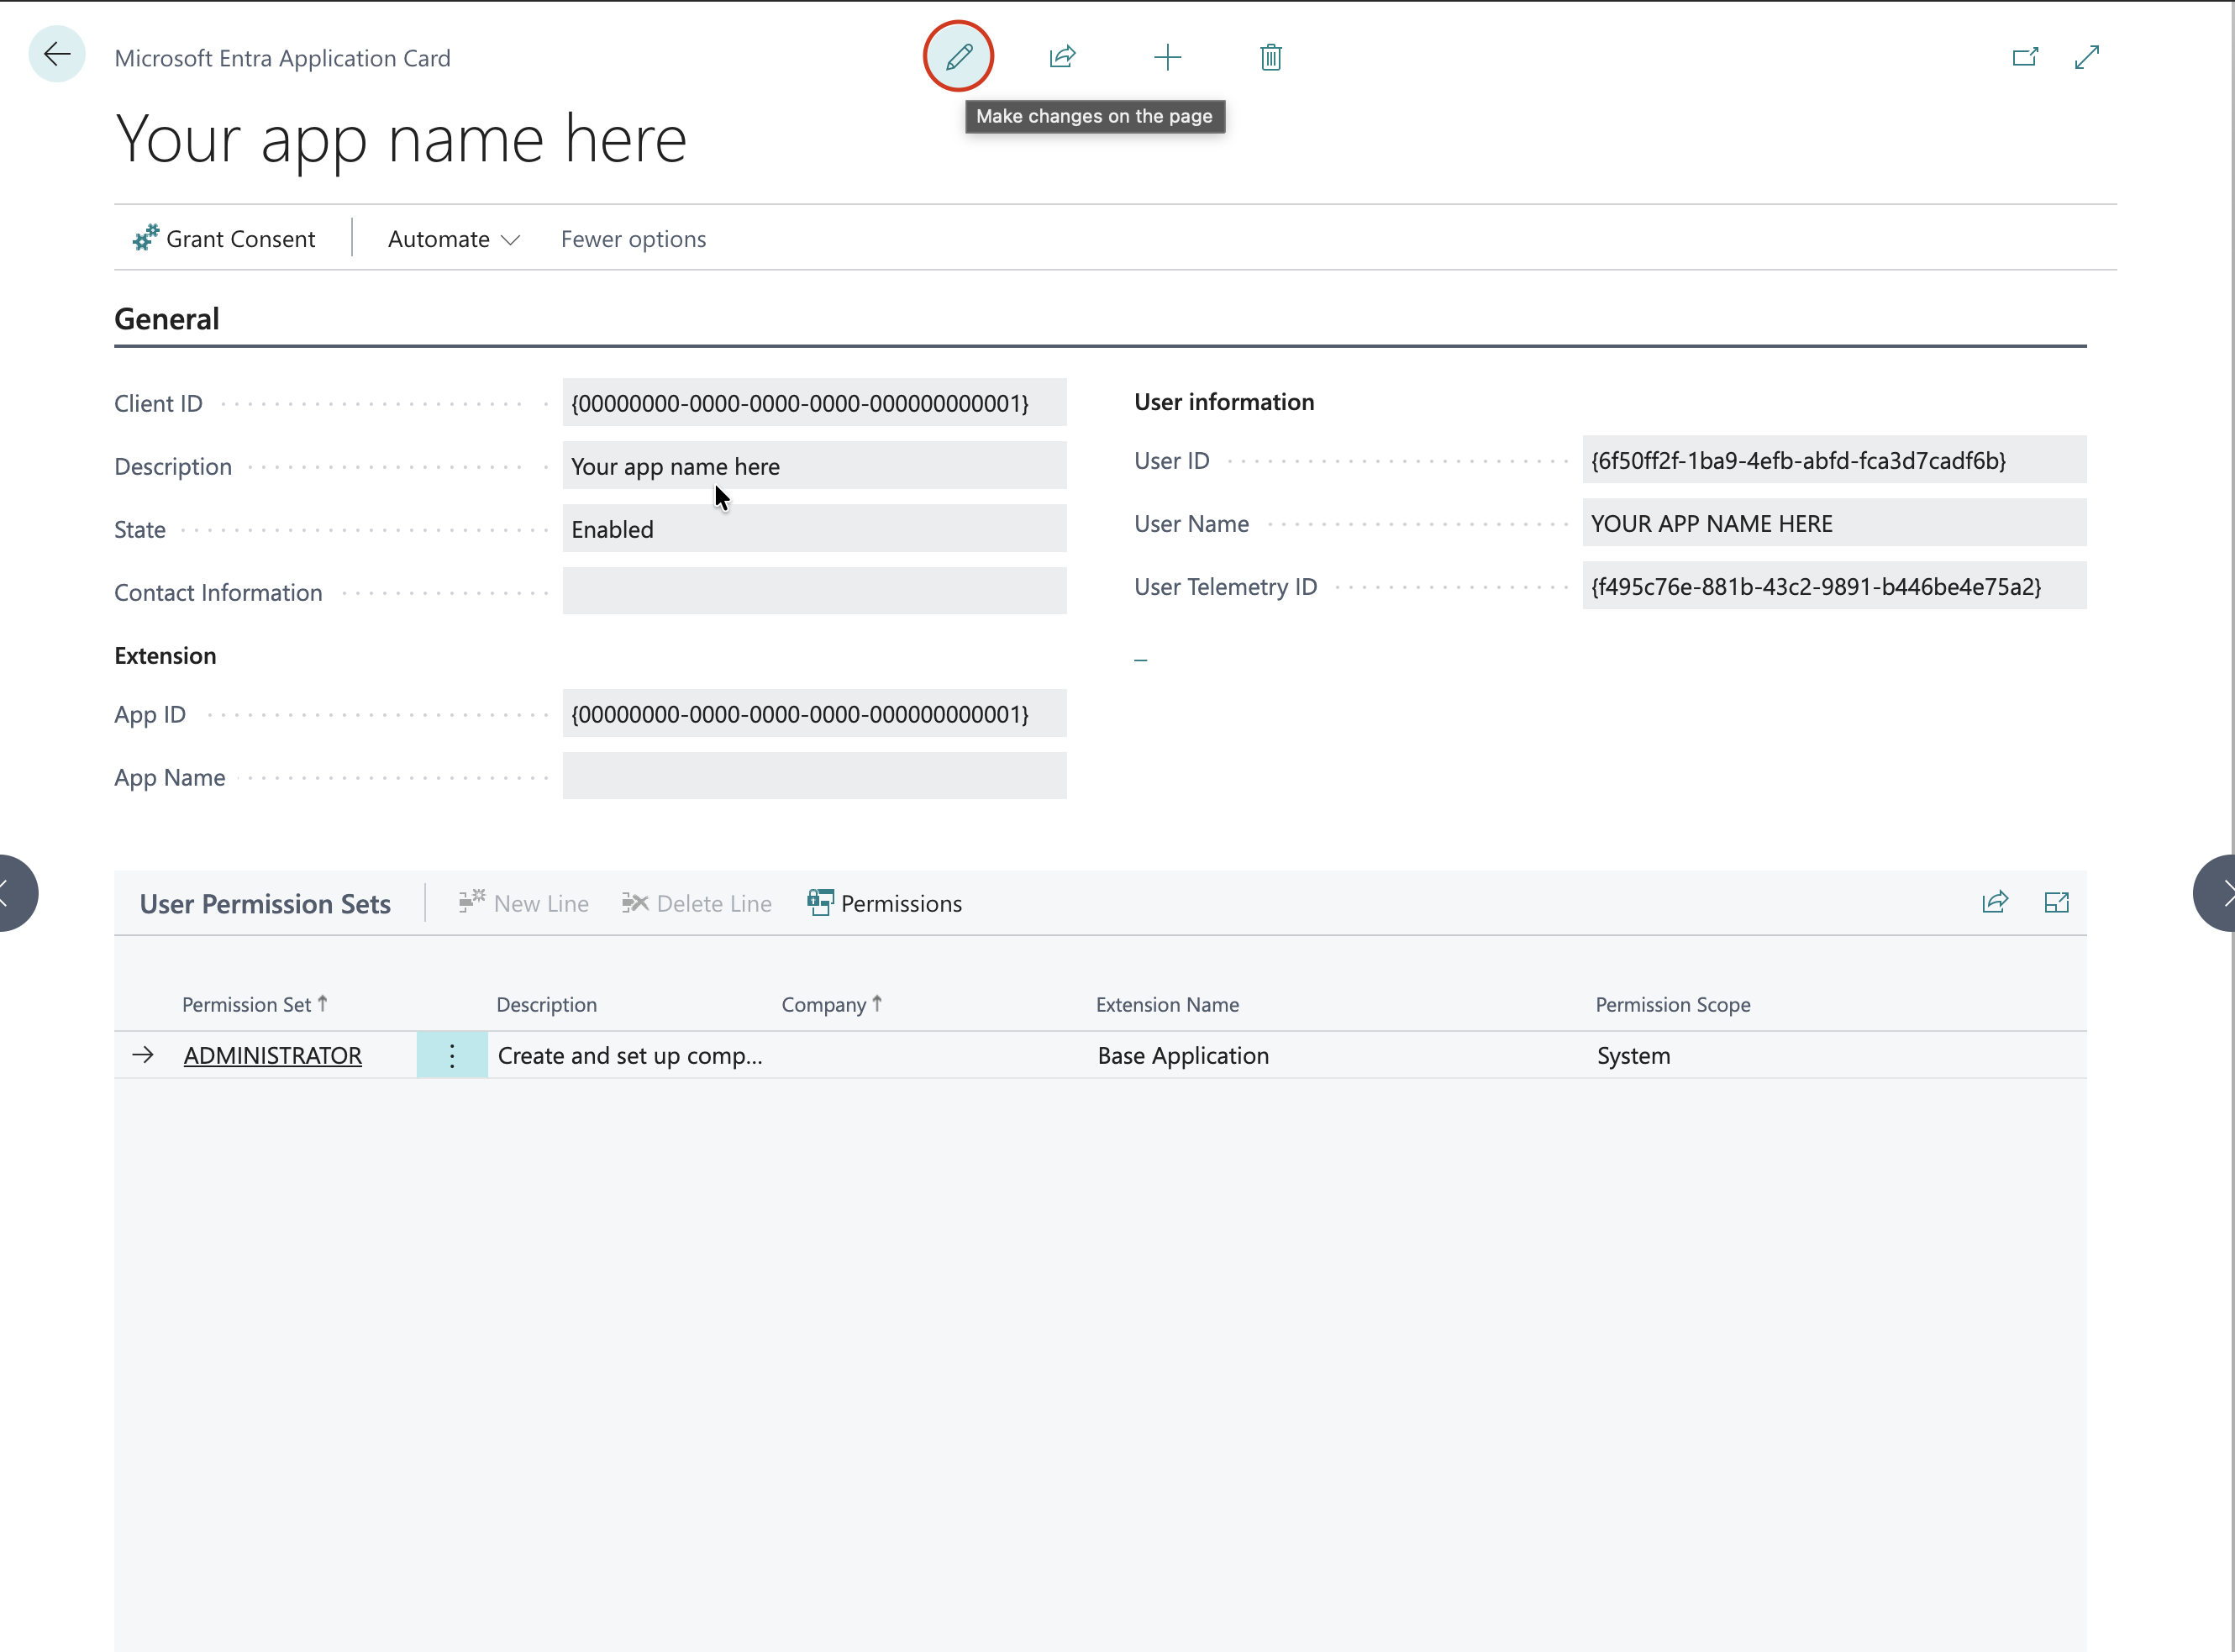 7. Your Azure App is now authorized inside Business Central and ready for use with RootFi.
***
You will need to enter your Client Credentials, Tenant ID and Env name in the RootFi connect screen.
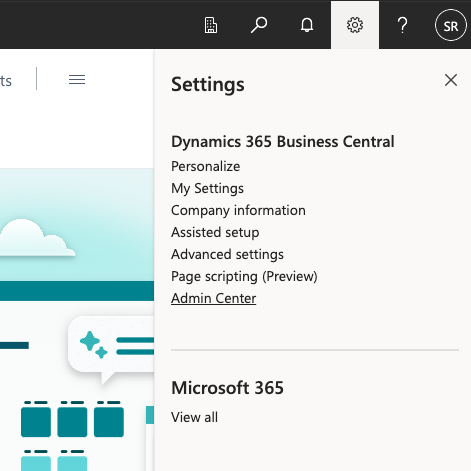
1. To get the Tenant ID and Env name, navigate to the BC dashboard, click on settings and then click on 'Admin Center'.
7. Your Azure App is now authorized inside Business Central and ready for use with RootFi.
***
You will need to enter your Client Credentials, Tenant ID and Env name in the RootFi connect screen.
1. To get the Tenant ID and Env name, navigate to the BC dashboard, click on settings and then click on 'Admin Center'.
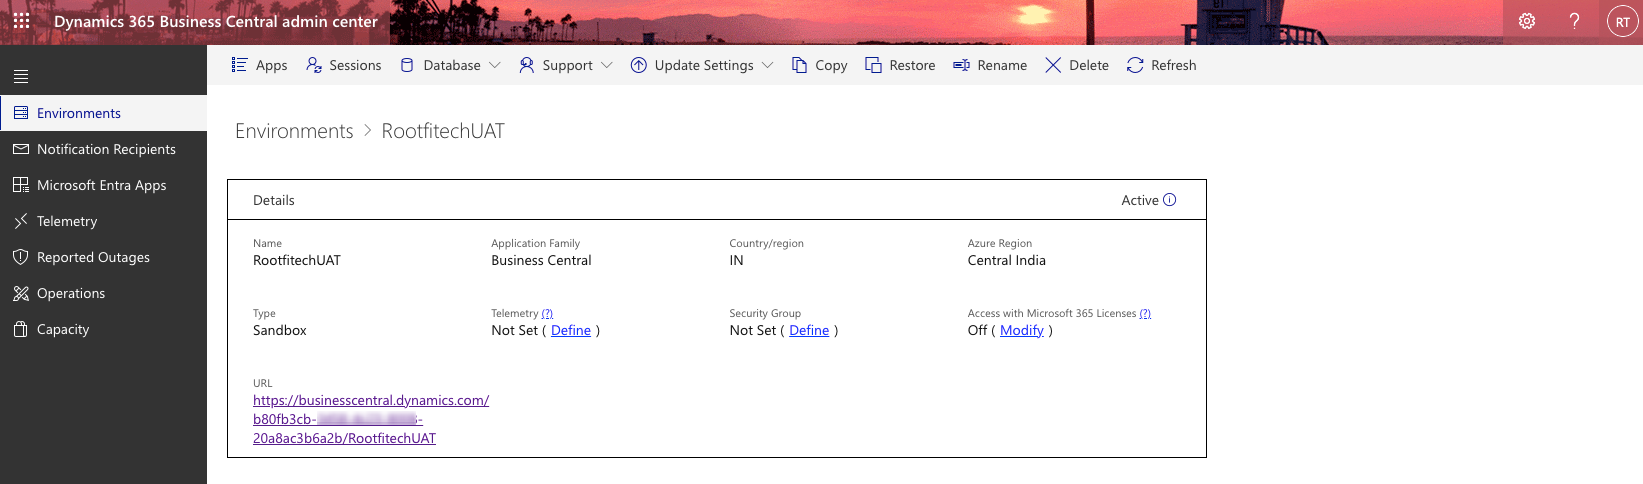
 2. Select the environment you want to connect.
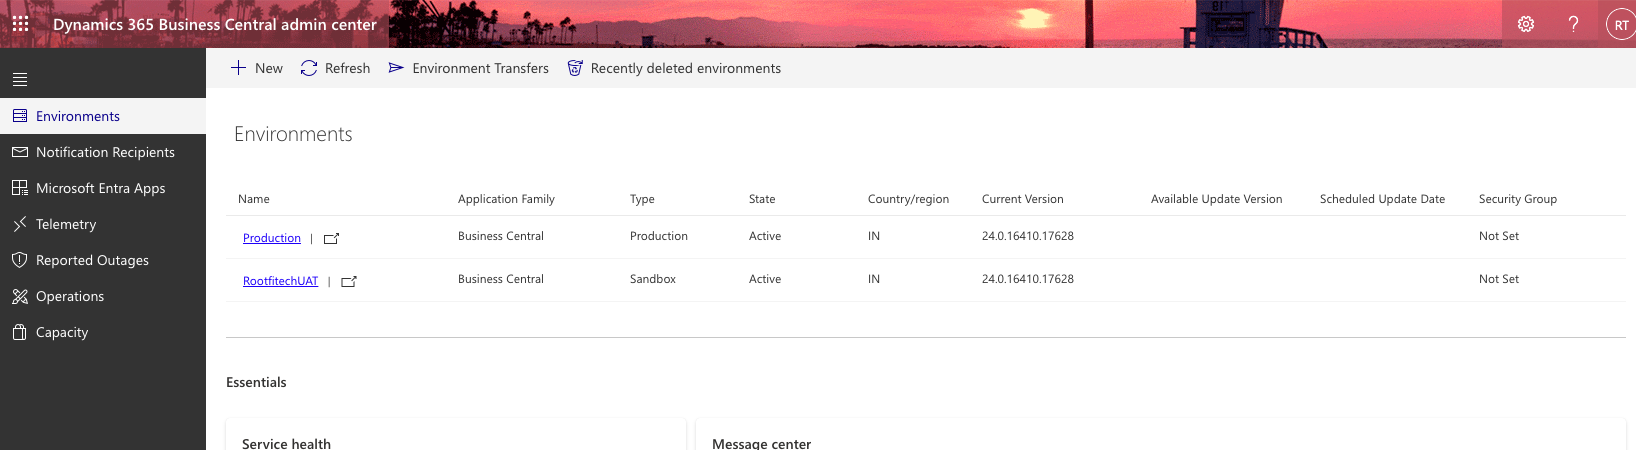 3. Copy the name of the environment and the tenant id from the URL. Use the following pattern to get the tenant ID of your Business Central: [https://businesscentral.dynamics.com/\[TENANT\_ID\]/\[ENVIRONMENT\_NAME](https://businesscentral.dynamics.com/\[TENANT_ID]/\[ENVIRONMENT_NAME)]
 ***
***