> ## Documentation Index
> Fetch the complete documentation index at: https://integrations.docs.commenda.io/llms.txt
> Use this file to discover all available pages before exploring further.
# Oracle NetSuite
> Learn how to set up our Oracle NetSuite integration.
To authenticate NetSuite, the following credentials are required:
* Consumer Key
* Consumer Secret
* Token ID
* Token Secret
This guide will demonstrate how to locate or generate these credentials within NetSuite.
## Pre-requisites
Before setting up the integration, make sure you meet the following requirements:
* You possess **Administrator** permissions in your company’s NetSuite instance or have access permissions shared with you by another user.
## Install the Bundle
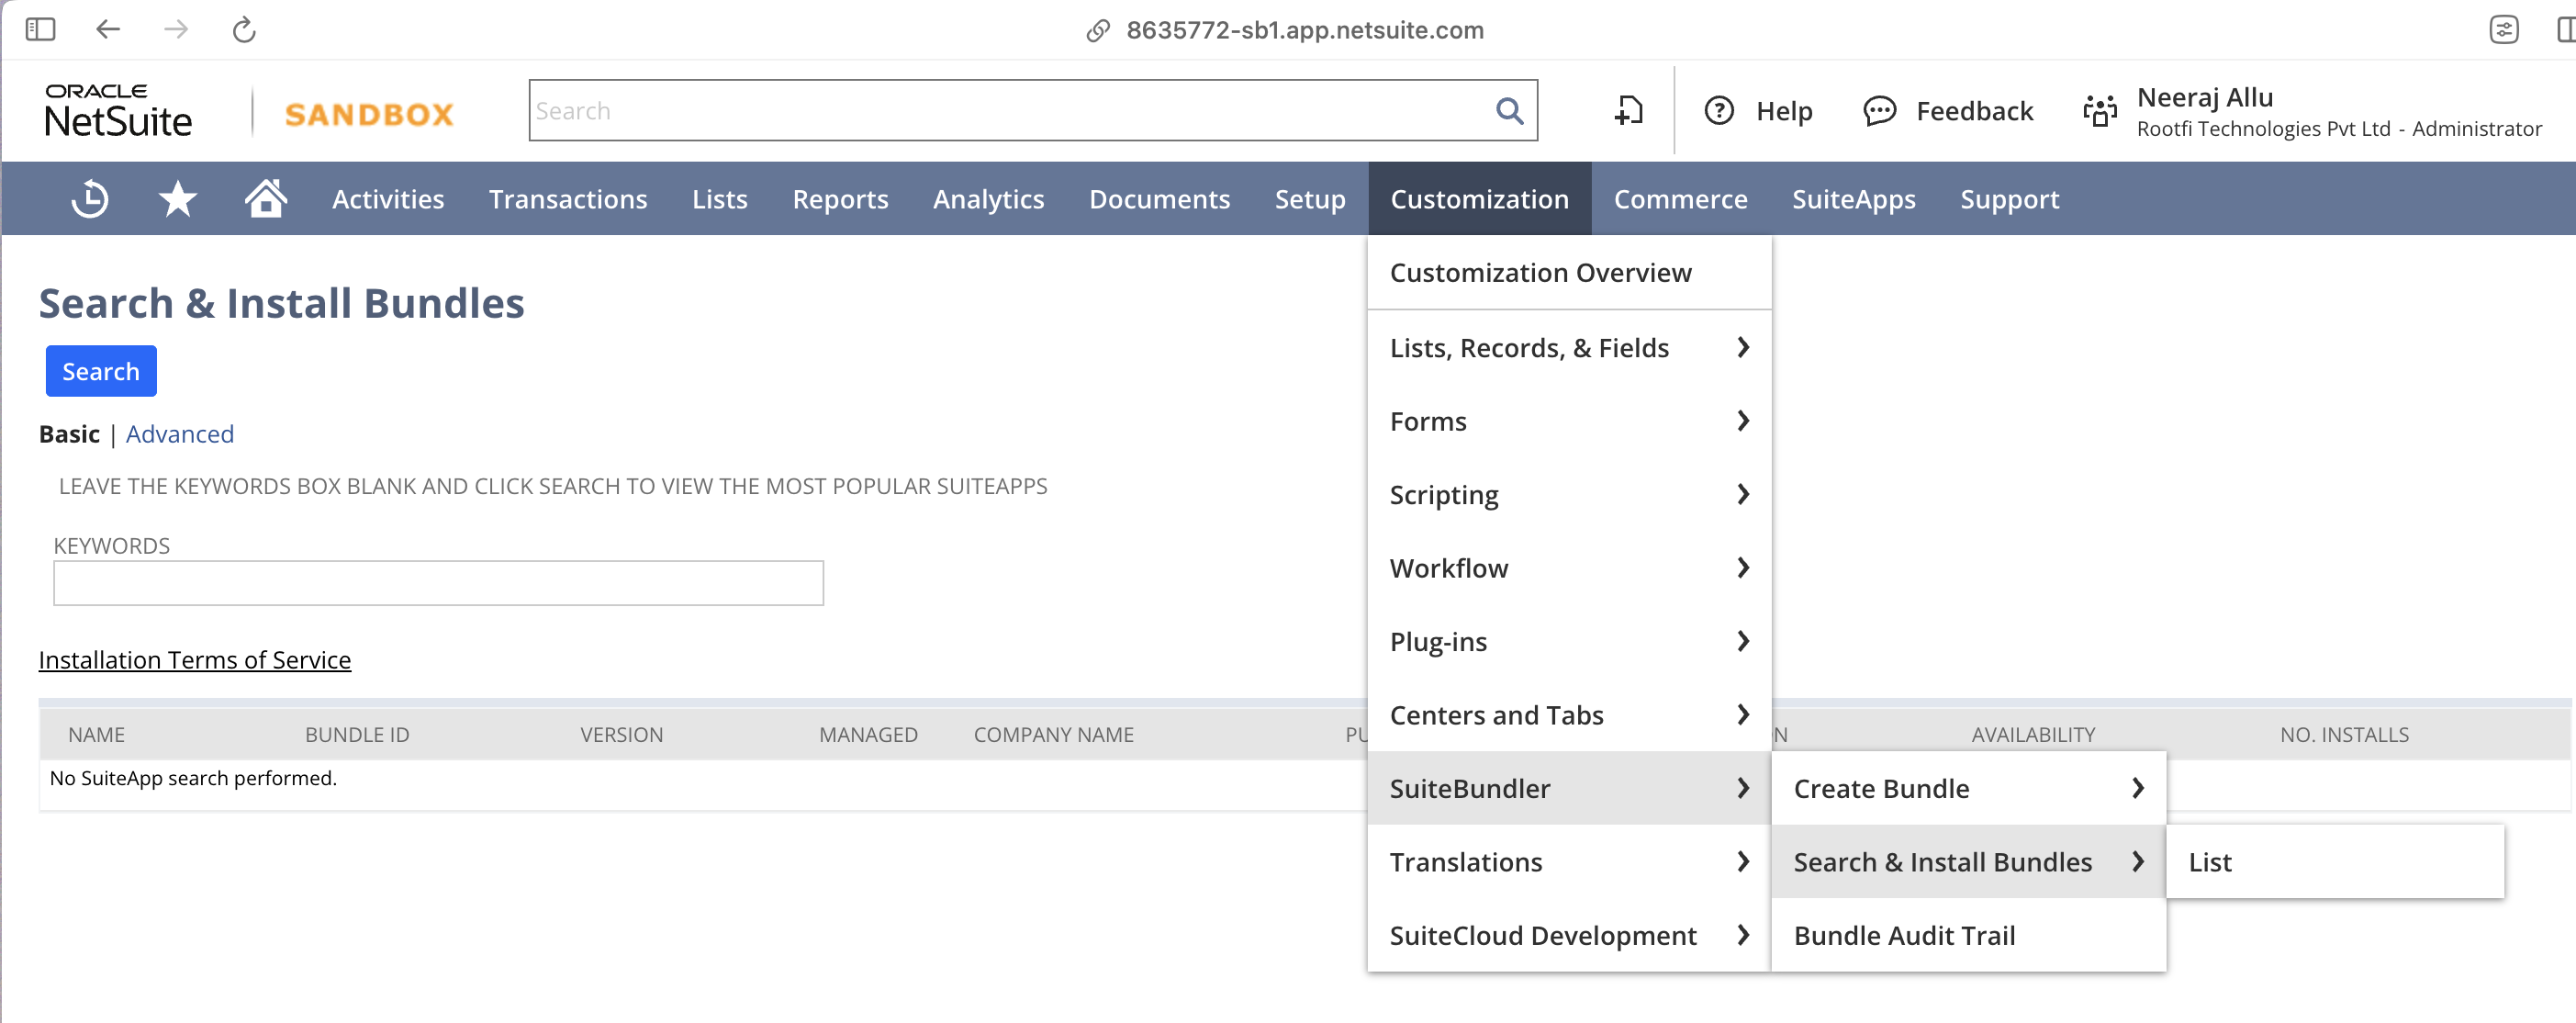
In your NetSuite account, navigate to **Customization** > **SuiteBundler** > **Search & Install Bundles** > **List** or search for Search & Install Bundles in the Search bar.
Search for the **RootFi Bundle** or bundle ID **489902** using the Keyword box. Select the bundle and click **Install**.
The bundle will begin installing and you maybe directed to the Installed Bundles page. It may take up to 5 minutes to install.
## Create a new integration to generate the Consumer Key and Consumer Secret
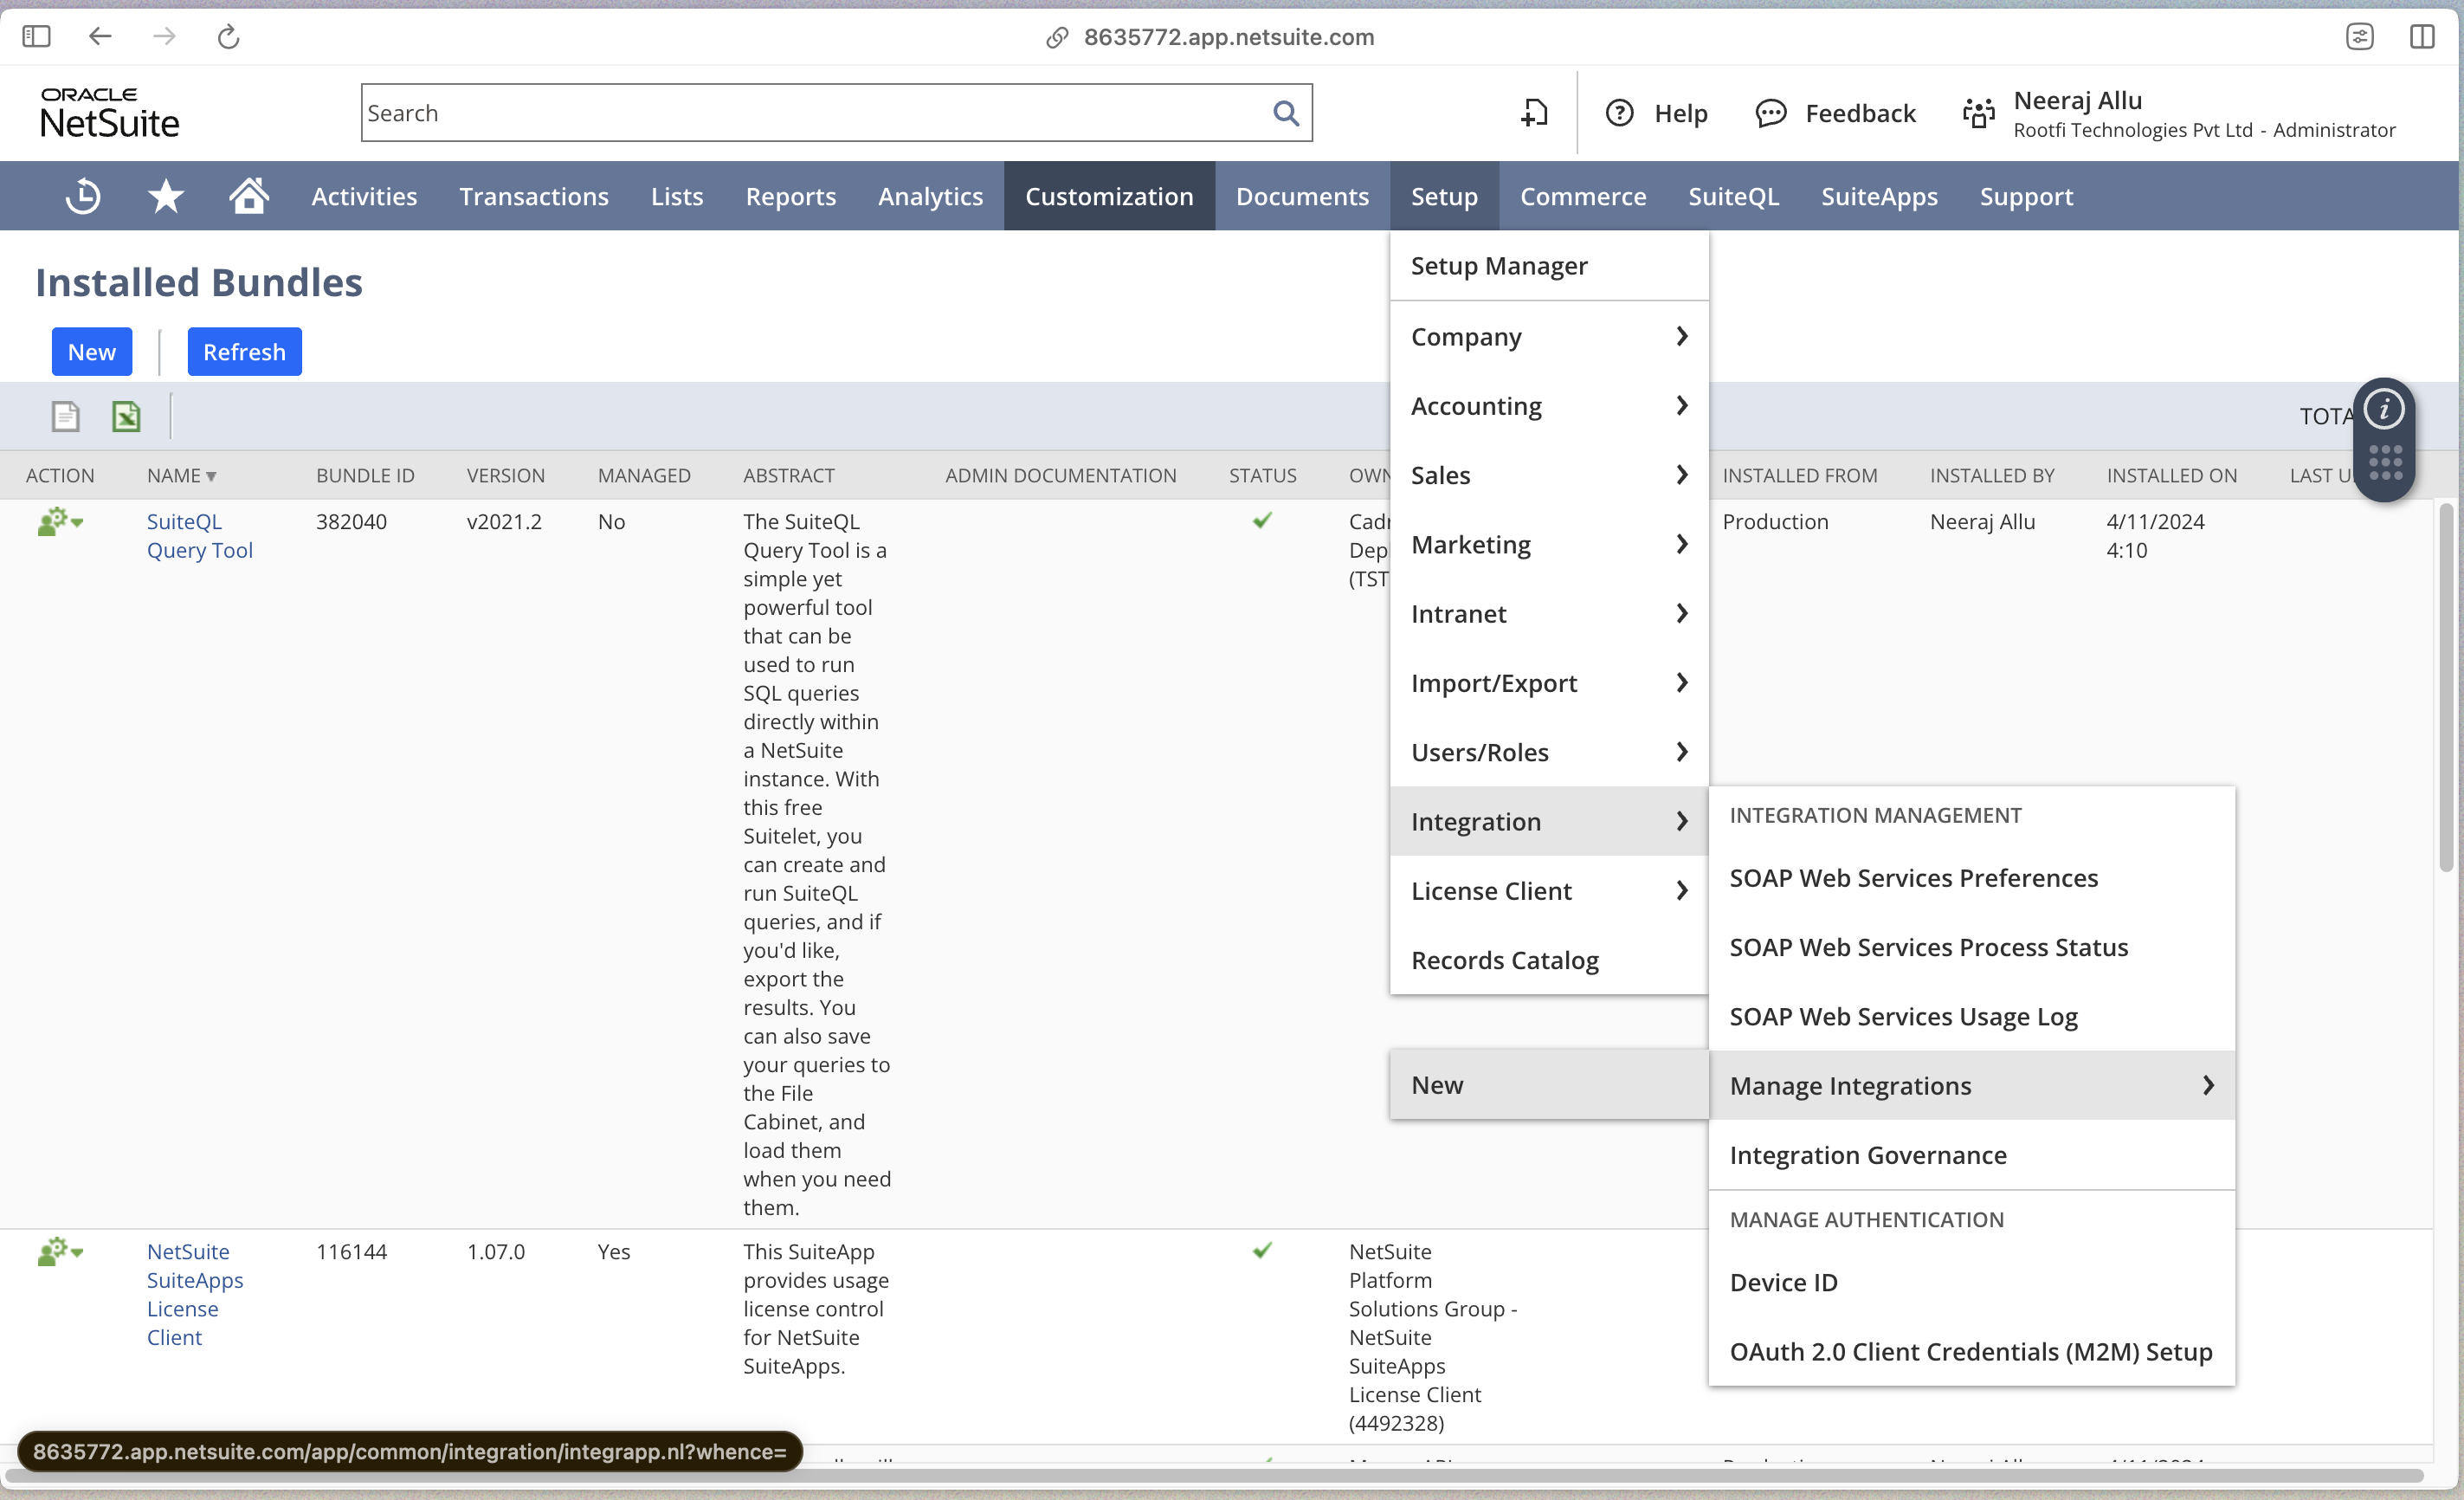
Navigate to **Setup** > **Integration** > **Manage Integrations** > **New** to create a new integration.
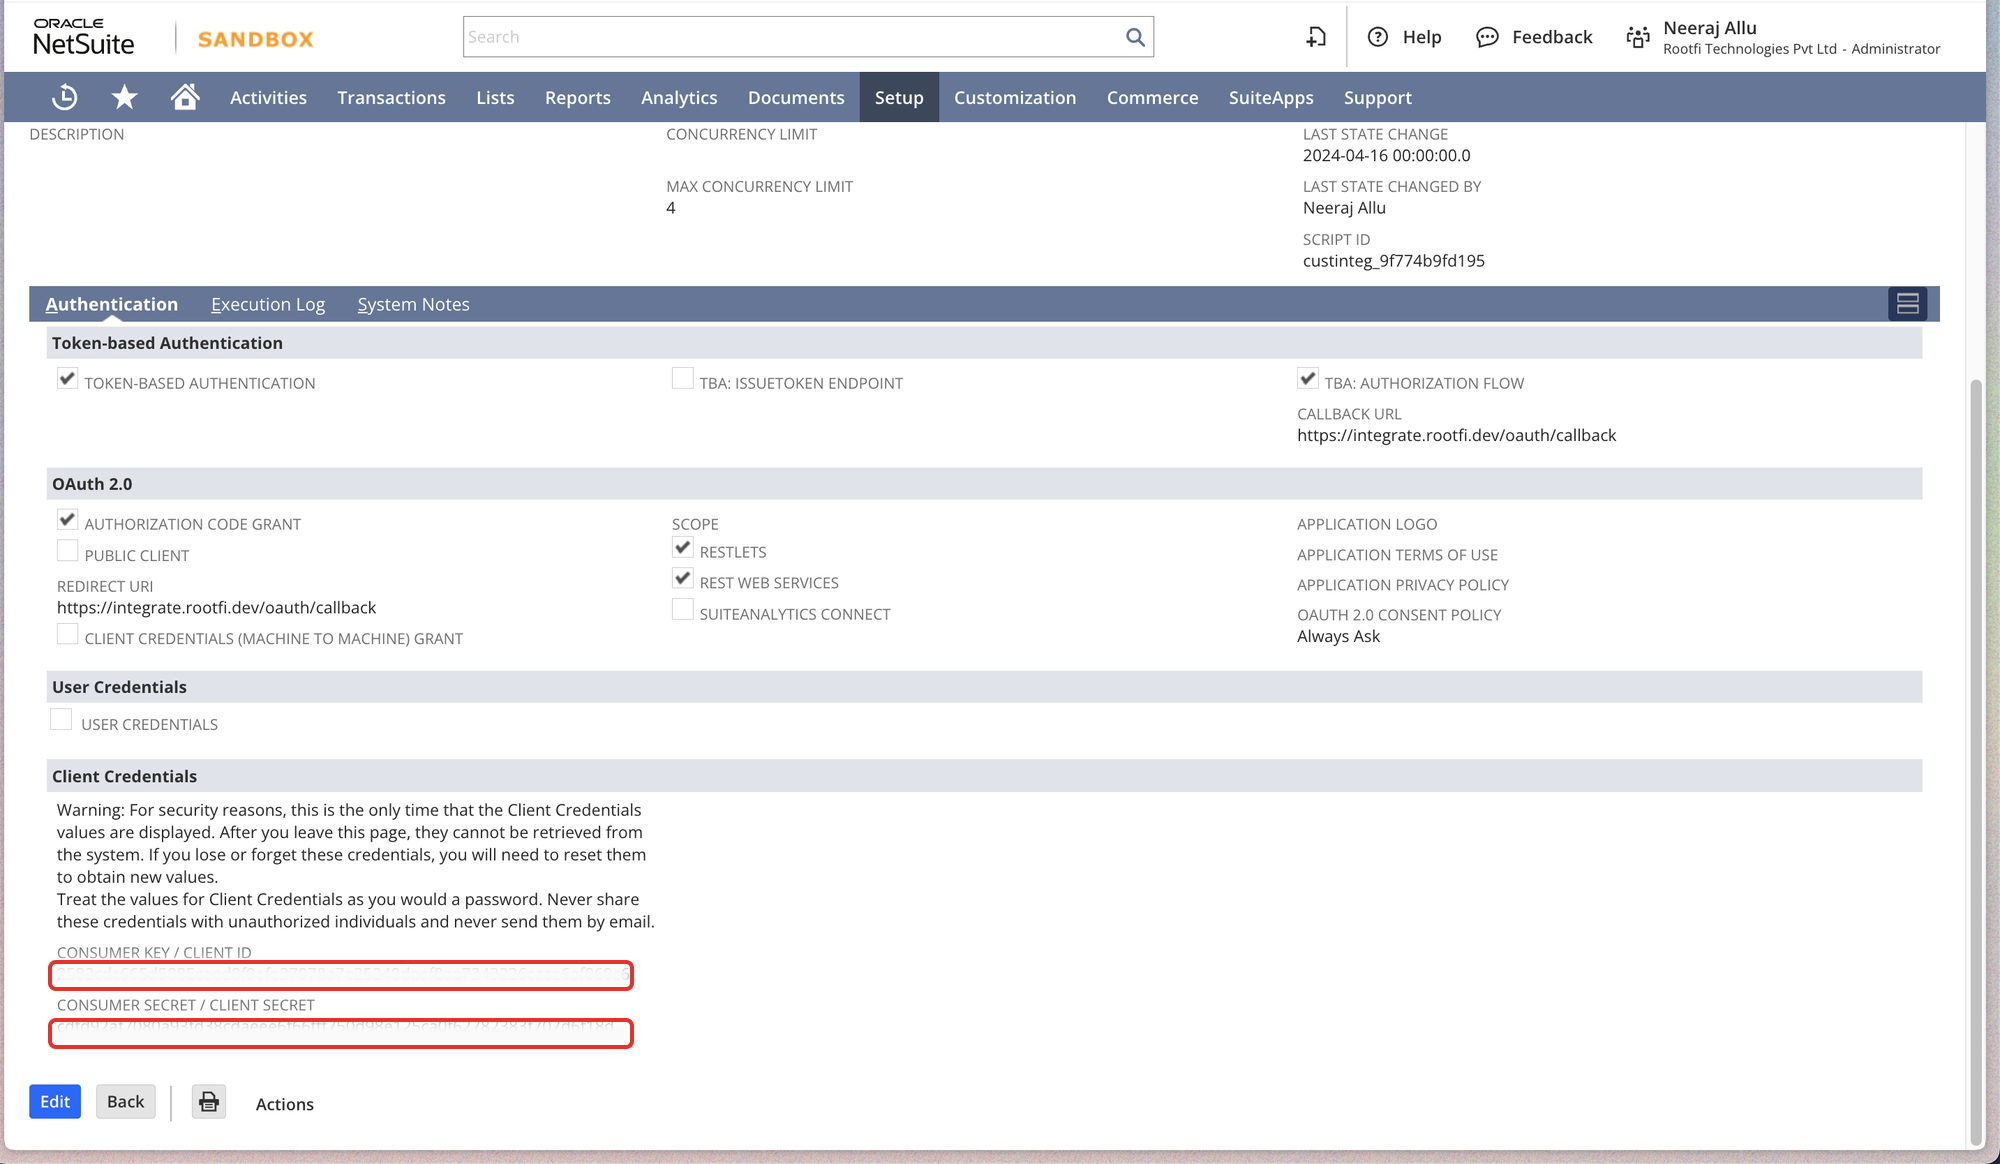
Create an integration with the below details:
* Any value can be populated in the **NAME** field
* The **CONCURRENCY LIMIT** should be left unpopulated
* Ensure the **REST WEB SERVICES box is checked** under SCOPE
* The **TOKEN-BASED AUTHENTICATION** and **TBA AUTHORIZATION FLOW** boxes should be checked
* Fill in the **CALLBACK URL** and **REDIRECT URI** with a value of \[[ROOTFI CALLBACK URL](/api-reference/v3/overview/environments#callback-urls)]\([ROOTFI CALLBACK URL](/api-reference/v3/overview/environments#callback-urls))
Save the integration to generate the **Consumer Key** and **Consumer Secret**. **This will only be shown once, so store them in a secure place.**
The bundle will begin installing and you maybe directed to the Installed Bundles page. It may take up to 5 minutes to install.
## Assign a user to the role
Navigate to **Setup** > **Users/Roles** > **Manage Users** or search **Manage Users** in the Search bar.
In the Manage Users page, either select a user to assign the Role to.
In the user's employee record, click **Edit** and go to the **Access** tab. In your Access tab, go to Roles and select **RootFi Role Permission**.
## Create an access token to get your Token ID and Secret
In your **Setup** tab, go to **User Roles** > **Access Tokens** > **New** or search **New Access Token** in the search bar to begin creating a New Access Token.
Select the Application Name (name of the integration you created in Step 2), User and Role (RootFi Role Permission) and click **Save** to generate a new access token.
Copy the **Token ID** and **Token Secret** provided. **This will only be shown once, so store them in a secure place.**
## Finding your NetSuite Account ID
Log into your NetSuite portal
Copy the subdomain of the URL at the top of your browser and enter it within the Connect Link. In the below screenshot it is **`8635772-sb1`.**
## Enter credentials in the Connect flow
* **Consumer Key**: Confirmation screen after creating the integration (Step 2)
* **Consumer Secret**: Confirmation screen after creating the integration (Step 2)
* **Token ID**: Confirmation screen after creating your Access Token (Step 3)
* **Token Secret**: Confirmation screen after creating your Access Token (Step 3)






 * **Consumer Key**: Confirmation screen after creating the integration (Step 2)
* **Consumer Secret**: Confirmation screen after creating the integration (Step 2)
* **Token ID**: Confirmation screen after creating your Access Token (Step 3)
* **Token Secret**: Confirmation screen after creating your Access Token (Step 3)
* **Consumer Key**: Confirmation screen after creating the integration (Step 2)
* **Consumer Secret**: Confirmation screen after creating the integration (Step 2)
* **Token ID**: Confirmation screen after creating your Access Token (Step 3)
* **Token Secret**: Confirmation screen after creating your Access Token (Step 3)